Installing IntelliJ
The first step to a good development environment is a good development environment. Wait what.
Installing the JetBrains Toolbox App
Section titled “Installing the JetBrains Toolbox App”Wait, what the hell is this? Didn’t we want to install IJ? Well yes, but for that we use the JBTA.
- Download the installer here: https://www.jetbrains.com/toolbox-app/
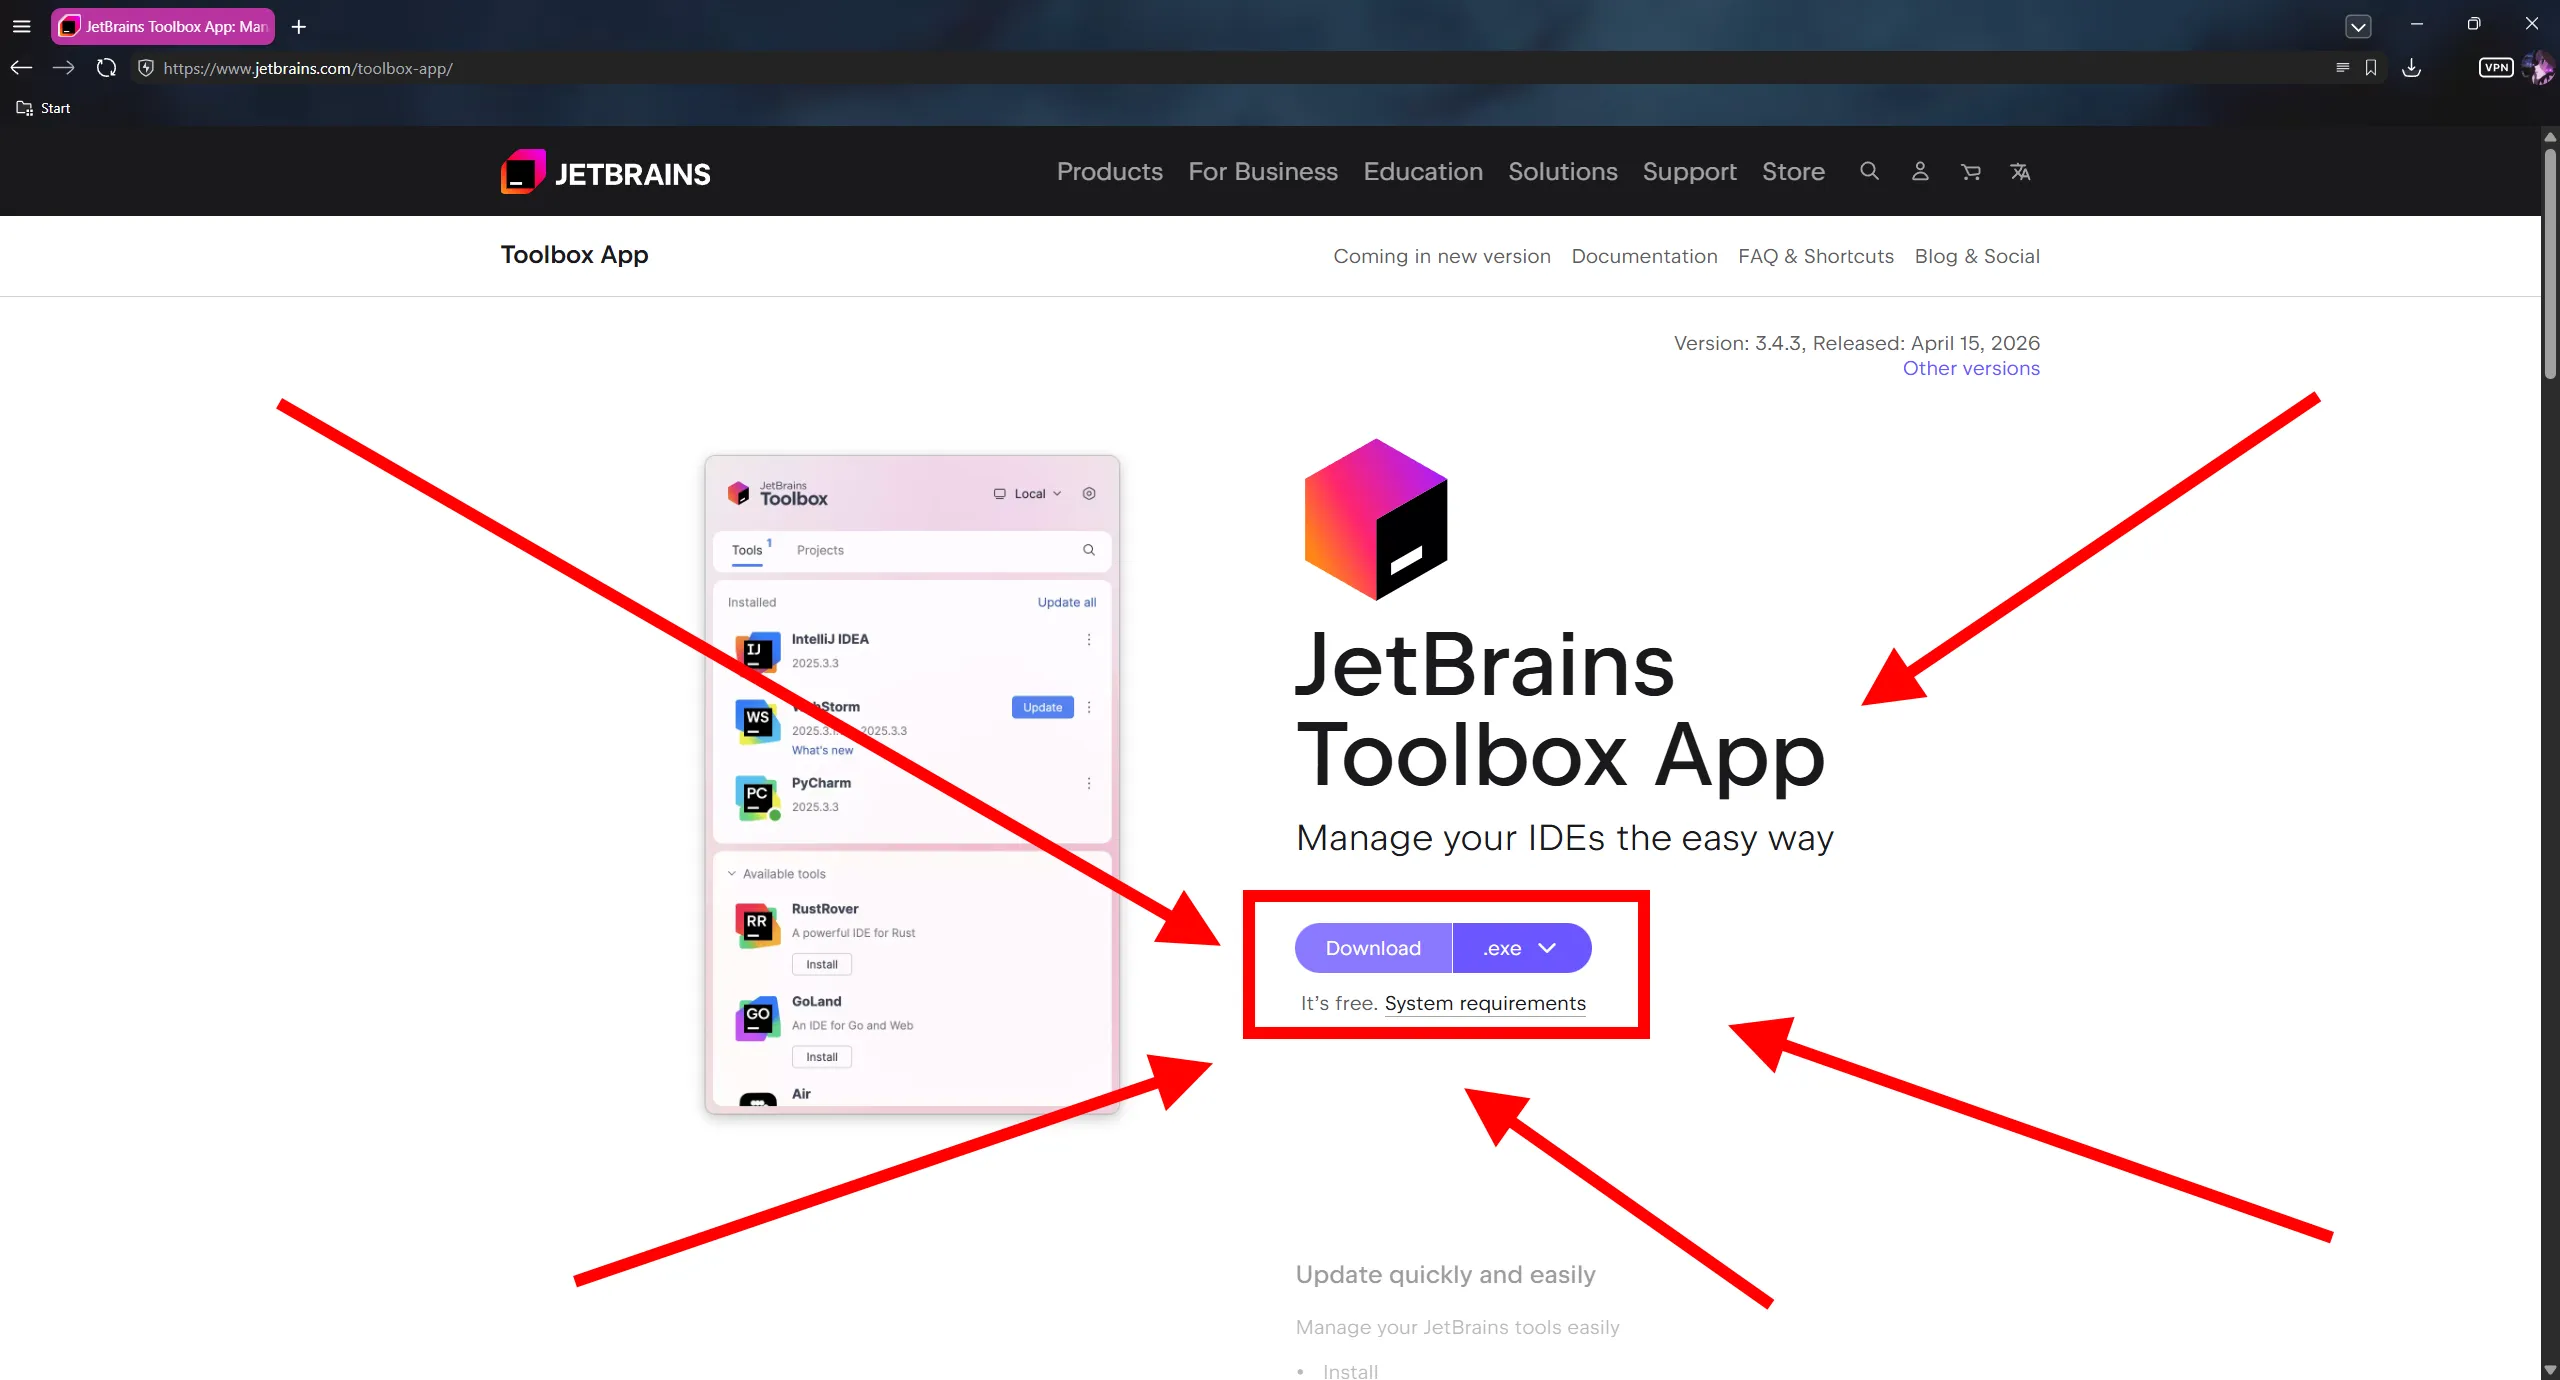
Just like the node, you can double-click the .exe file as soon as it is fully downloaded to start the installation.

Step 1: Install
Section titled “Step 1: Install”Running the exe will open a window, where you just press the big blue Install button. Here, with red arrows in case
you somehow missed it:
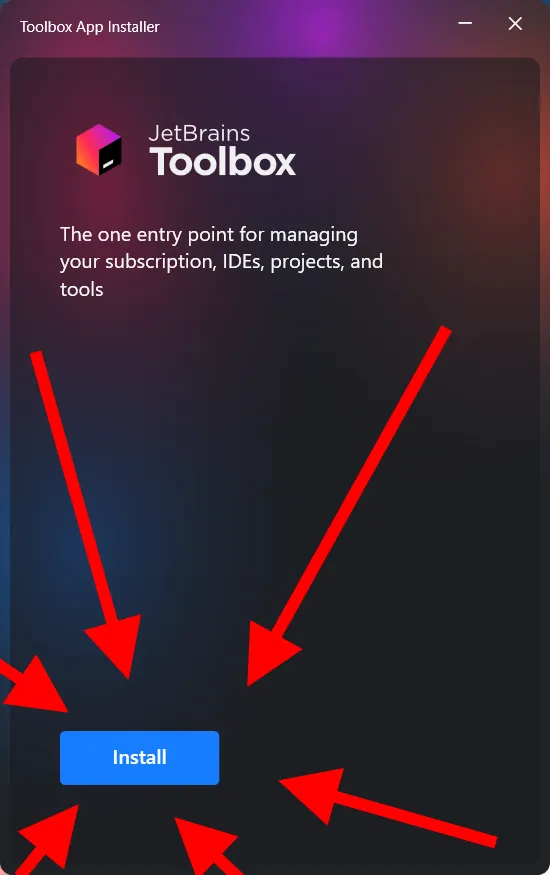
Okay that’s it. That’s all you had to do.
Installing IntelliJ
Section titled “Installing IntelliJ”With the Toolbox App now installed, it will probably start automatically. If not, check your taskbar, there should be an icon for it, just click that.
Step 1: Open Toolbox
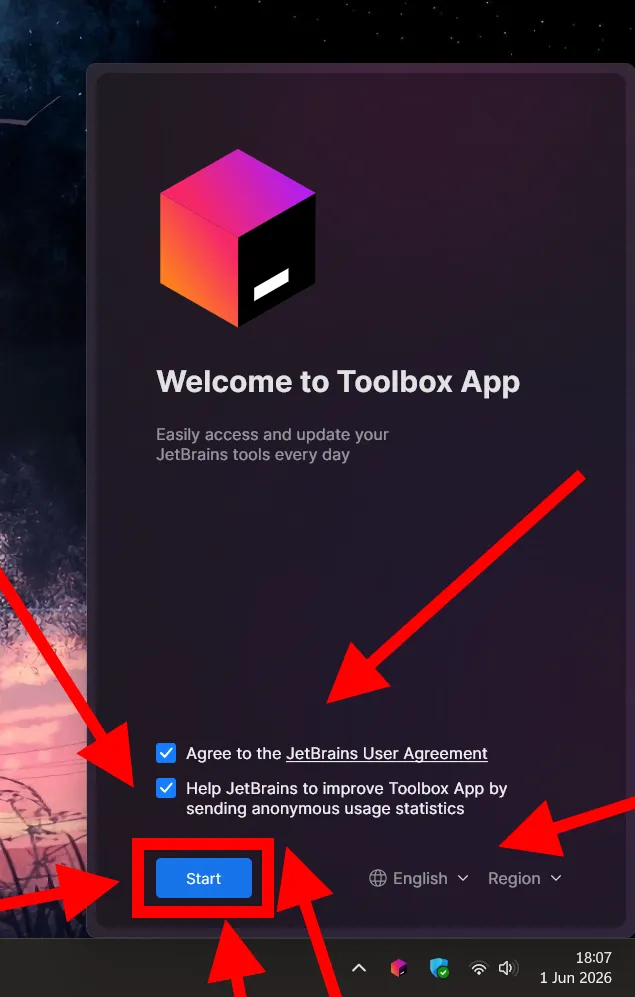
Section titled “Step 1: Open Toolbox”Read and maybe agree to the JetBrains User Agreement. Also, definitely tick the checkbox to send anonymous user statistics (I definitely did not untick it after the screenshot).
Click Start.
Step 2: Install IntelliJ
Section titled “Step 2: Install IntelliJ”Now that you have gone through the initial start thingy, just find IntelliJ IDEA and click the Install button.
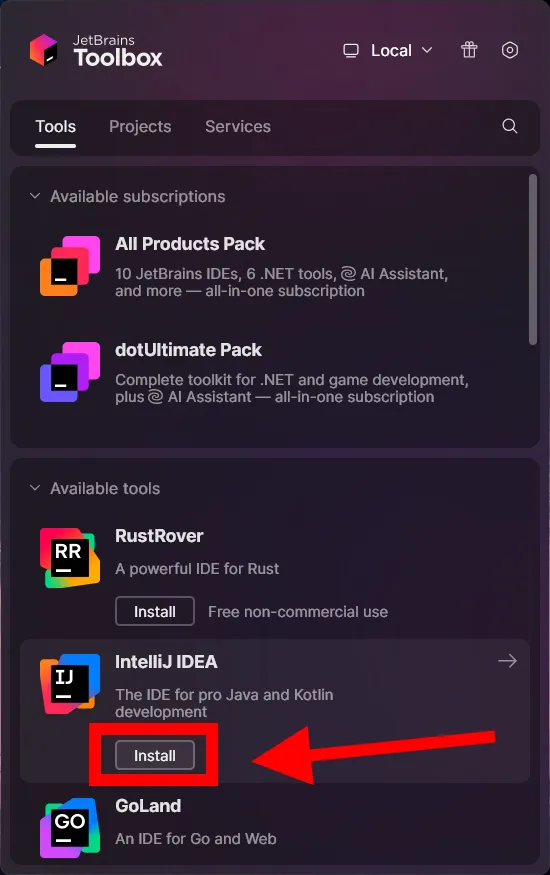
After the installation has completed, you can click on IntelliJ inside the Toolbox App to start it. Alternatively, you can find it through the start menu by searching for “IntelliJ”.
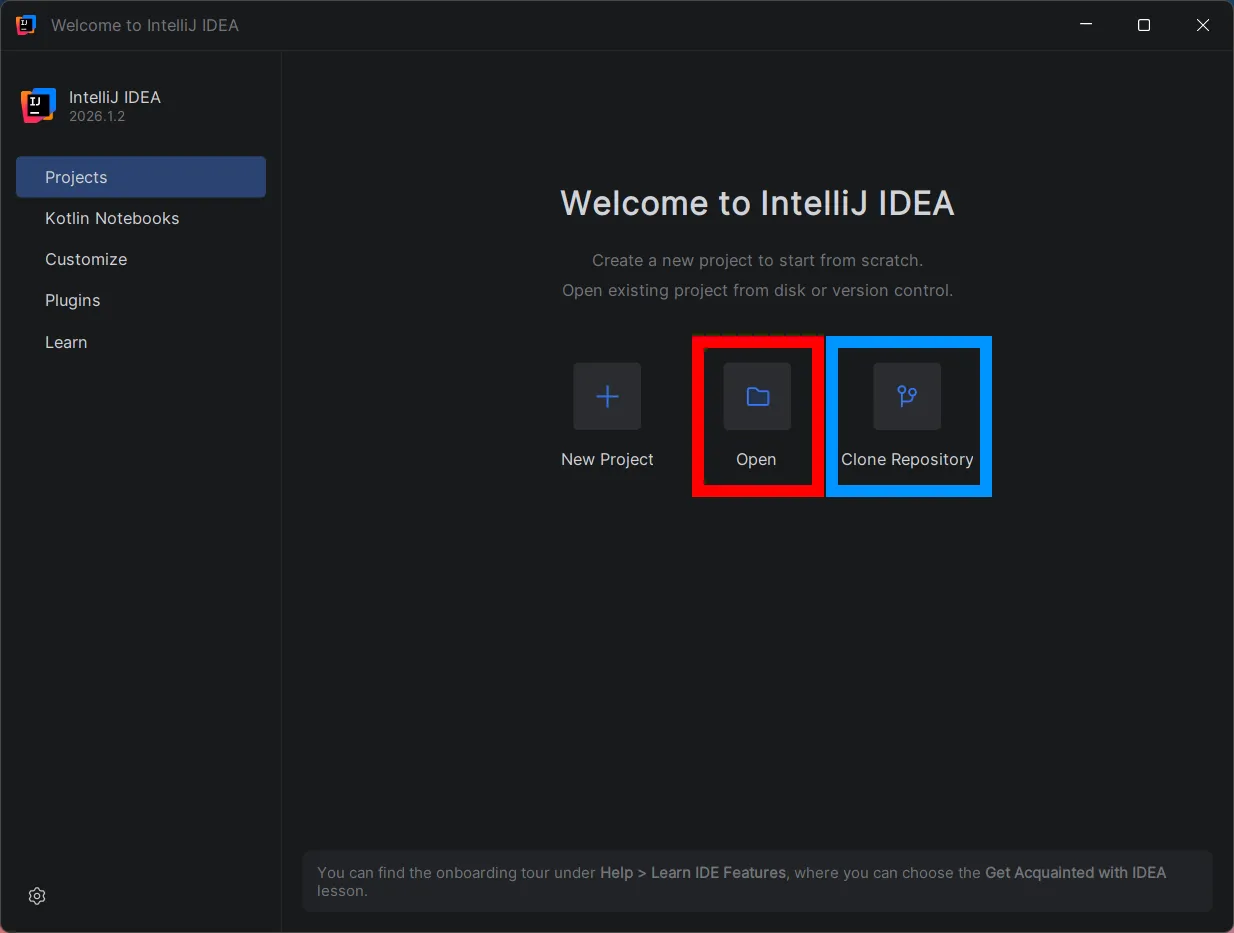
Opening the project
Section titled “Opening the project”You have two options:
- If you already have the project downloaded somewhere on your disk, literally just open it. See the red square.
- If you want to fetch it from GitHub again, follow Cloning the project.
Cloning the project
Section titled “Cloning the project”Go to https://github.com/paperchansite/paper-chan.moe, click the green Code button, select HTTPS and copy the web url.
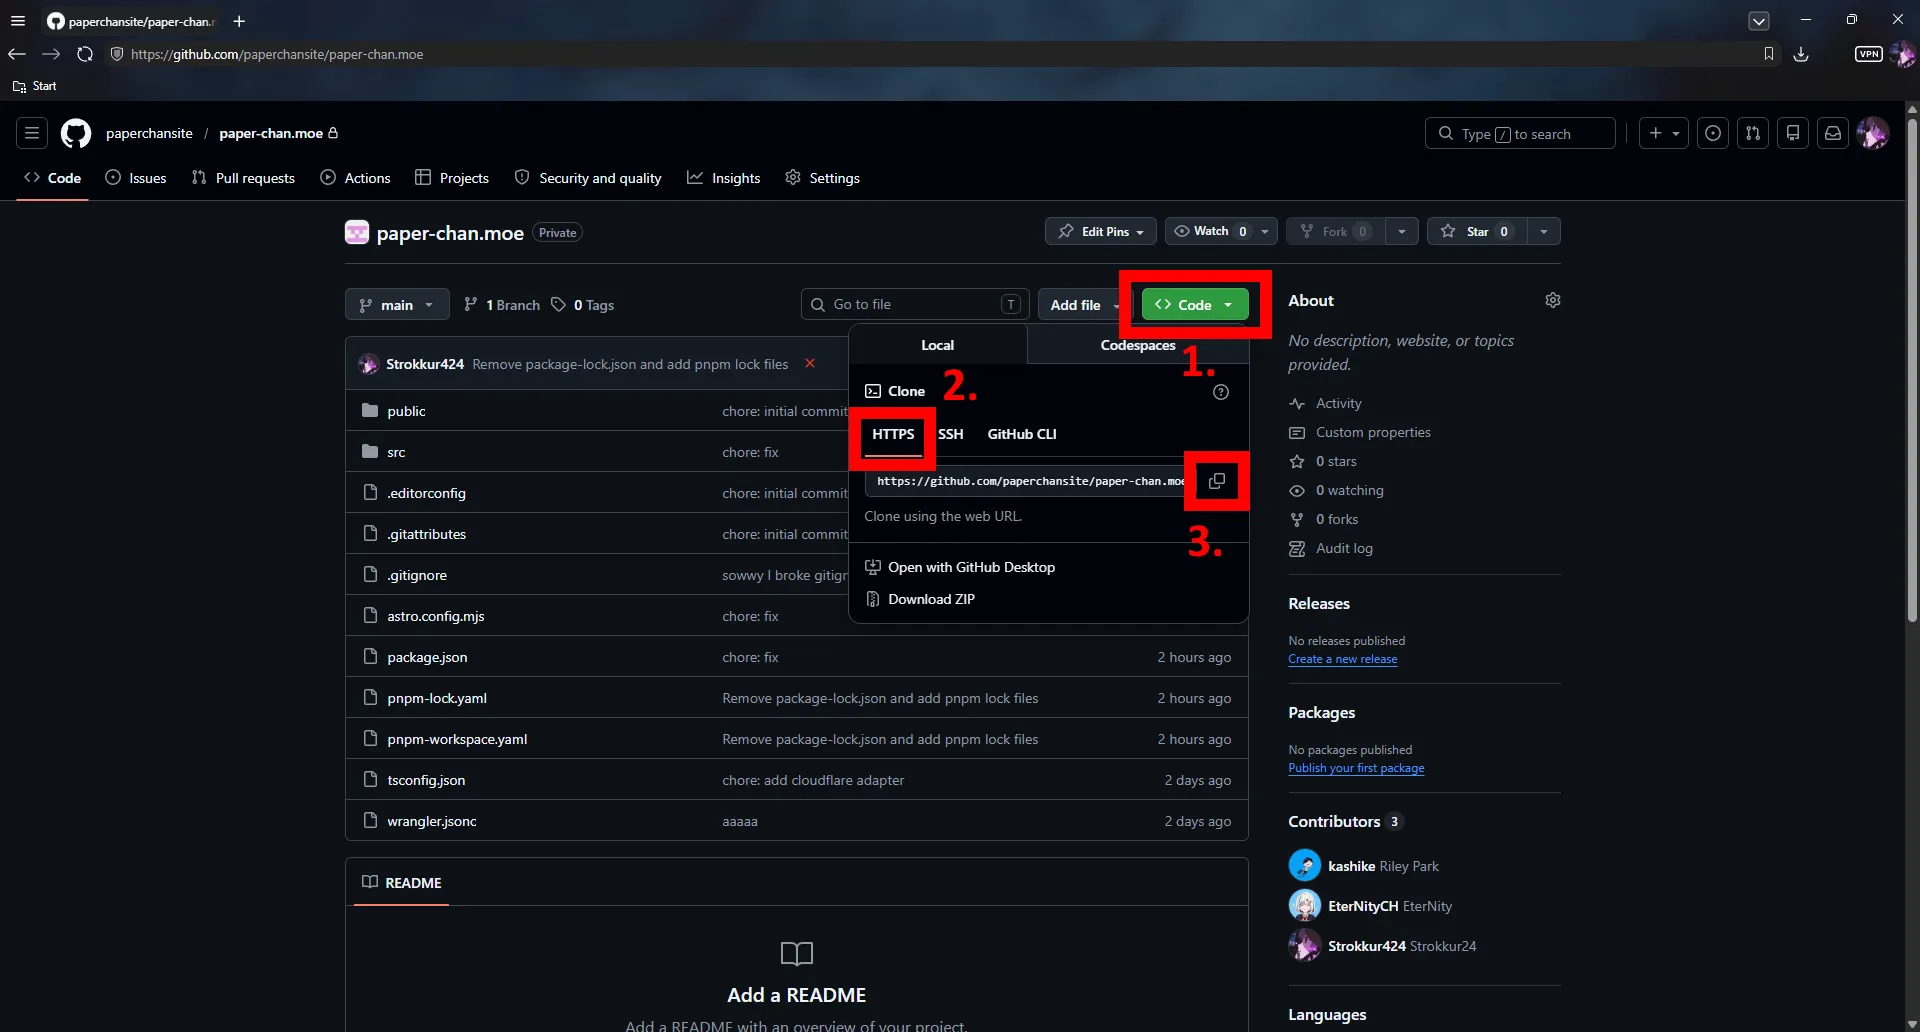
Now click on the Clone Repository button in Intellij, input the URL you just copied, and set the directory you want to clone the project into. This will use the current folder as the root folder of the project, it will not create a new subfolder!
Click the Clone button, and if everything goes right, you will land in your project!